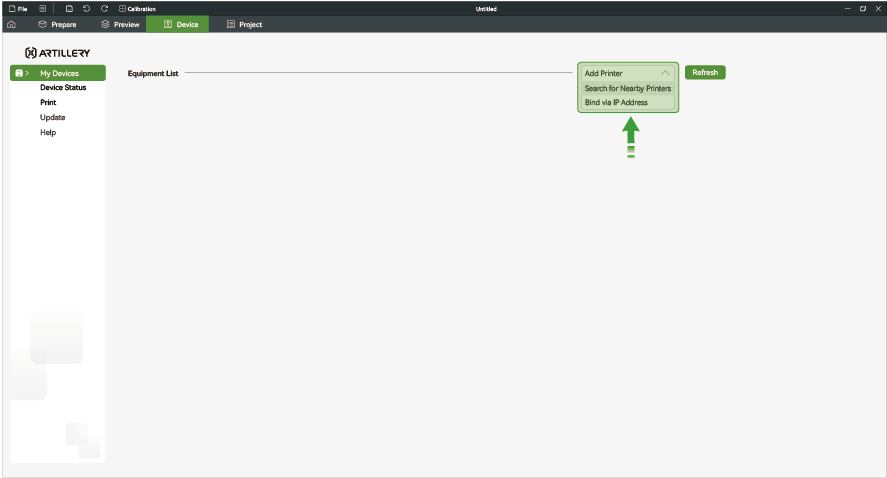
¶ Add Printer
From the “Add Printer” dropdown menu on the right side of the screen, two connection methods can be selected:
- Search for nearby printers
- Connect via IP address
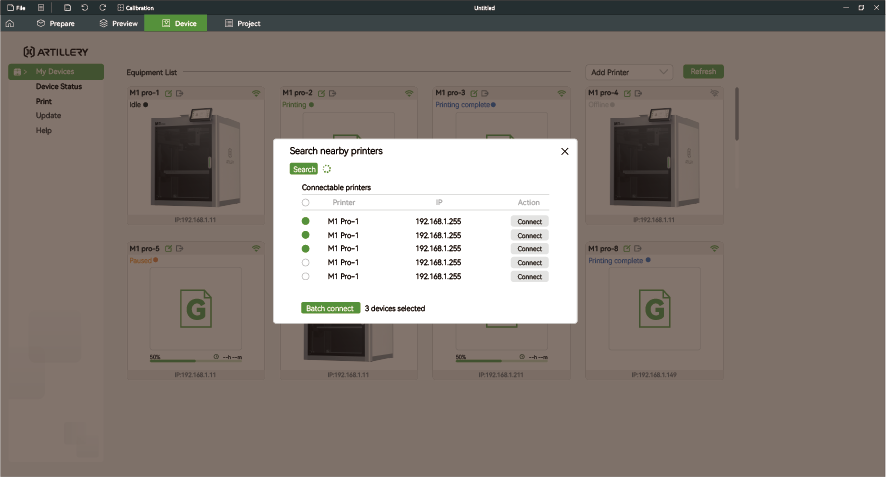
¶ Search for Nearby Printers
Description of the printer search function in the local area network (LAN):
- Click “Search” to scan for available devices on the current network.
- After selecting the target device, click “Connect” to establish communication.
- Multiple selection is supported to connect several devices at once.
- The connection status of the device is displayed in real time in the device list.
¶ Device Binding via IP Address
Rules for entering IP addresses: 1. Start IP: must be entered manually in full. 2. End IP: the first three fields are automatically
synchronized with the start IP; only the last field needs to be entered.
- Enter the IP address range (start and end) to scan for available devices in the subnet.
- Adding and removing IP ranges is supported.
- Click “Cancel” to exit the current configuration screen.
- Click “OK” to start scanning – the result display is the same as in “Search for Nearby Printers”.

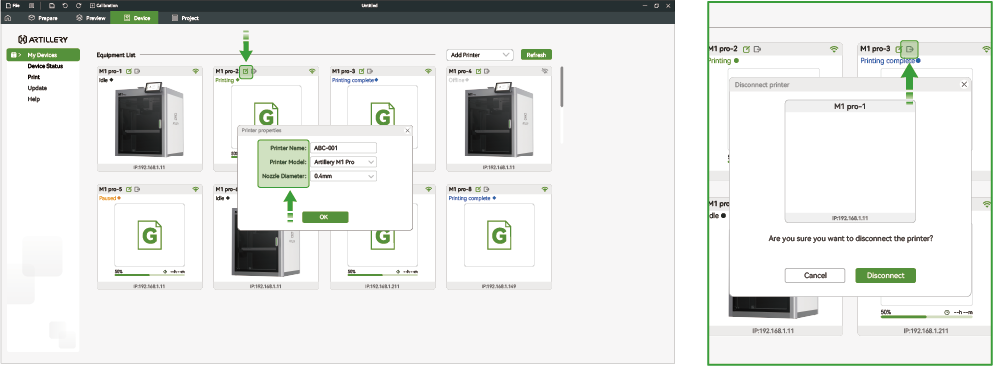
¶ Printer Management
In the device menu, you can adjust the properties of already connected printers or disconnect them:
- For connected printers, you can change the device name, model, and nozzle diameter.
- Other compatible models can be selected via a dropdown menu.
- There are four options available for the nozzle diameter: 0.2 / 0.4 / 0.6 / 0.8 mm — the default value is 0.4 mm.
- Disconnecting and unbinding the printer is supported.
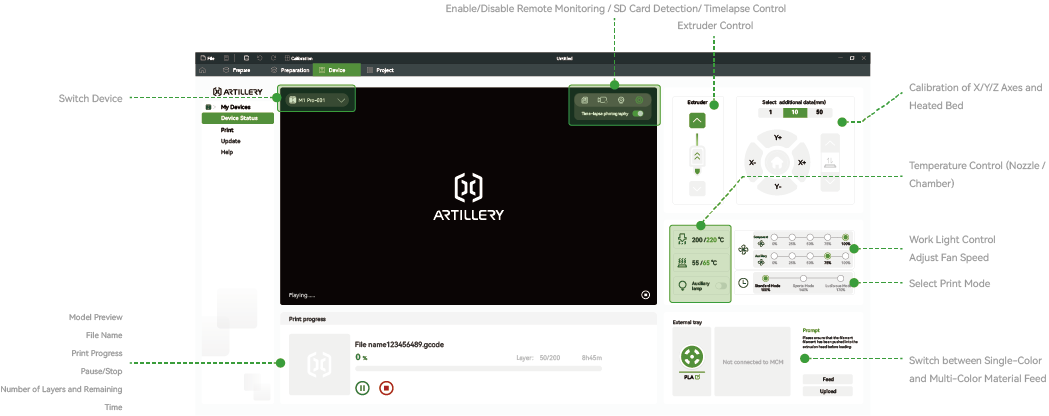
¶ Device Status
n the menu item “Device → Device Status”, the user can remotely monitor the printer and execute various control commands such as pause or stop.
It is possible to switch between connected devices and enable or disable remote monitoring as needed.
The system automatically detects the inserted SD card and also supports control of time-lapse recordings. During the printing process, the print
status can be monitored and the extruder can be manually controlled. Functions for calibrating the X, Y, and Z axes as well as the heated print bed
are also available. The temperatures of the nozzle and the build chamber can be adjusted individually. The work light can also be activated, and the
fan speed is adjustable. Additionally, the user can select the print mode and switch between single-color and multi-color material feed.
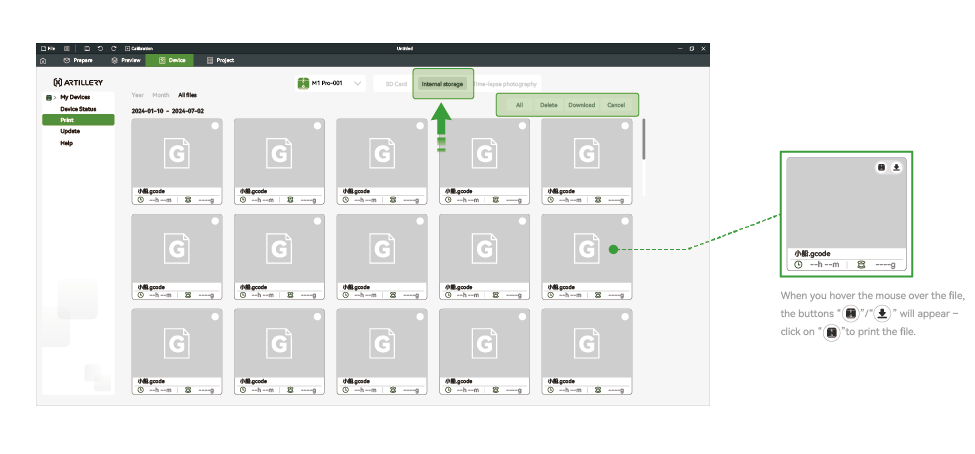
¶ Print Histor
SD Card / Timelapse File Management: Supports batch deletion and downloading of stored print files.
- Refresh – Updates the file list view
- Select – Activates multi-selection mode and displays selection markers; the following actions are available:
- Select All – Selects all files
- Delete – Removes the selected files
- Download – Saves the selected files to the local computer
- Cancel – Exits the editing mode
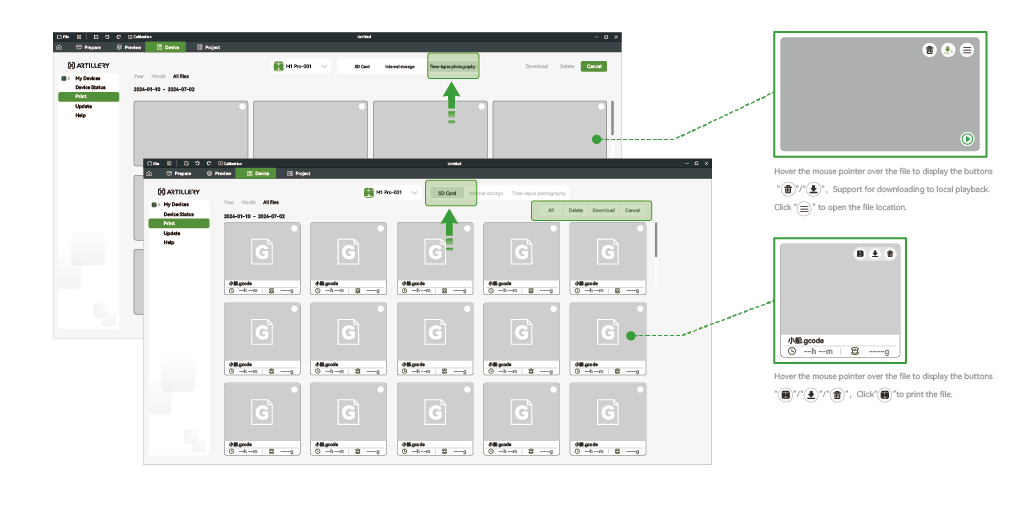
Management of Files Stored on the Printer: Batch transfer to the SD card and download to the local computer are supported.
- Refresh – updates the file list
- Select – activates multi-selection mode with the following options:
- Select All – selects all files in the list
- Export – transfers the selected files to the SD card
- Download – Saves the selected files to the local computer
- Cancel – Exits the editing mode