WIFI connection benefits: can help update to the new firmware version, computer WIFI remote connectivity multiple printing operations, printing video screen monitoring operations.(Remarks: M1pro WIFI network function, only supports 2.4G band)
¶ Boot WIFI connection guidelines
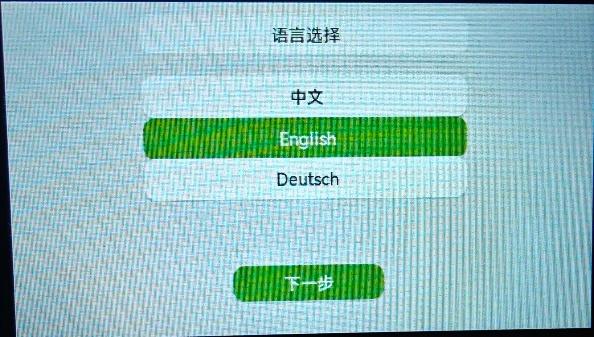
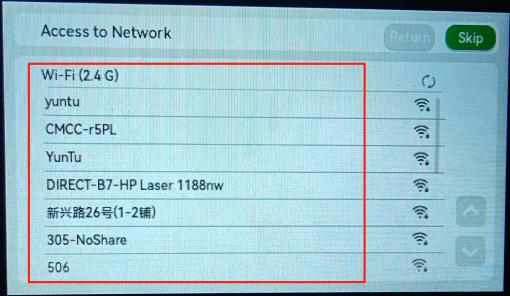
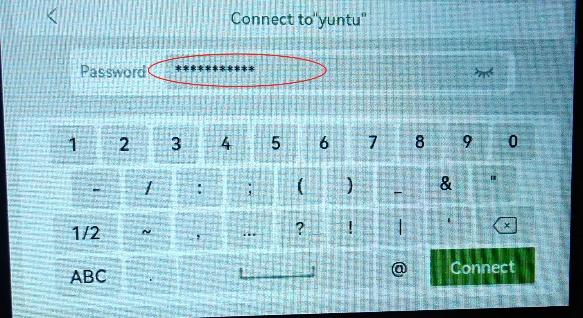
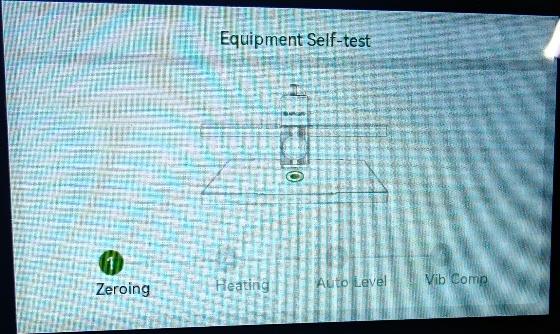
Power on the machine, the screen enters the language selection into the next step, Wifi (2.4G network) Refresh to the nearby WIFI network. Enter the user WIFI network, on-screen keyboard enter the correct WIFI password to connect, connect successfully. Enter the self-test function for about 15 minutes to enter the print operation interface.
As shown in the picture:
 |
 |
 |
 |
¶ The operation interface turns WIFI on/off
Power on the machine, enter the interface to select the network WIFI switch will automatically open (do not need to connect to wi-fi when you can close the wi-fi function) at the same time can search for nearby WIFI users, enter the user's WIFI network, enter the correct WIFI password in the on-screen keyboard to connect, prompted by a successful connection, display IP address.
As shown in the picture:
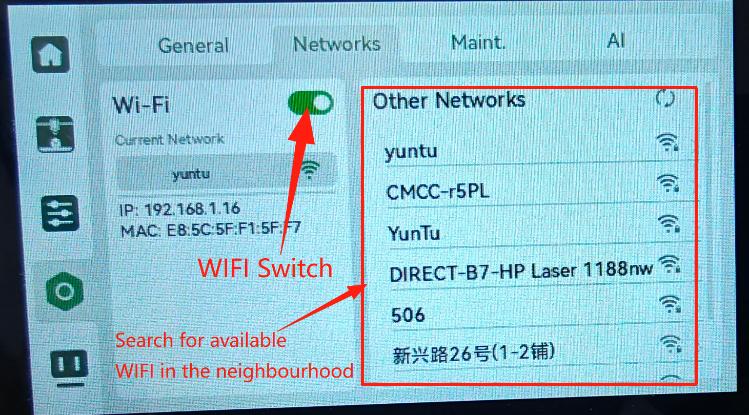 |
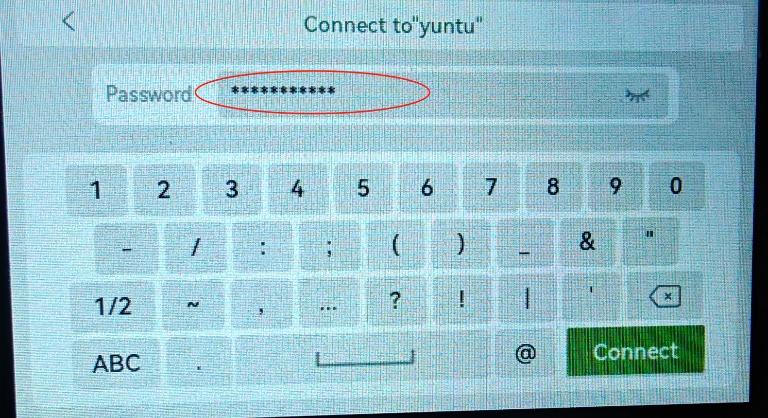 |
¶ Firmware update operation
Connect WIFI successfully
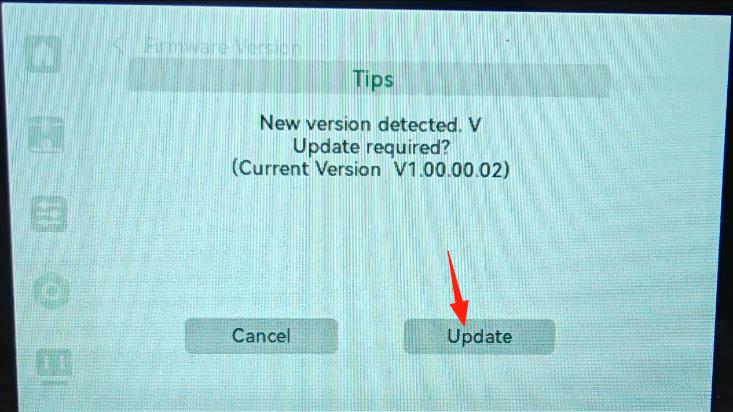
① re-off - turn on the machine to enter the interface, there will be a pop-up prompt to update the firmware, you can choose to update. If the machine firmware is already pop-up prompted. by the version of the firmware
As shown:
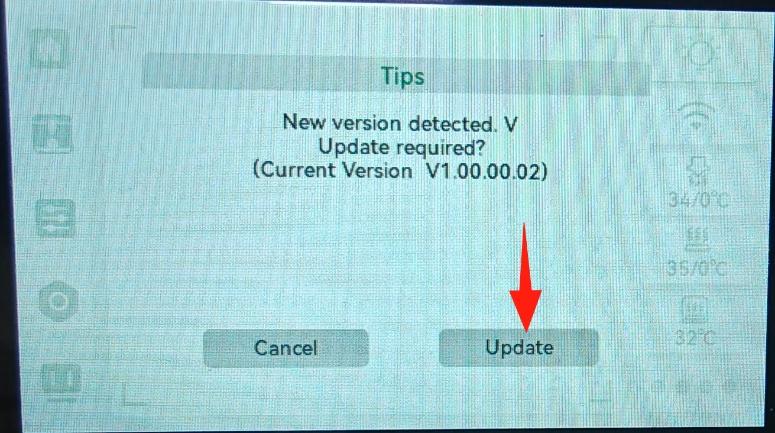
② Operation into the general interface, click the firmware version to enter. If there is a new version of the firmware will automatically pop-up update prompts, select the update can be. If the machine firmware is already the version of the firmware pop-up prompt.
As shown:
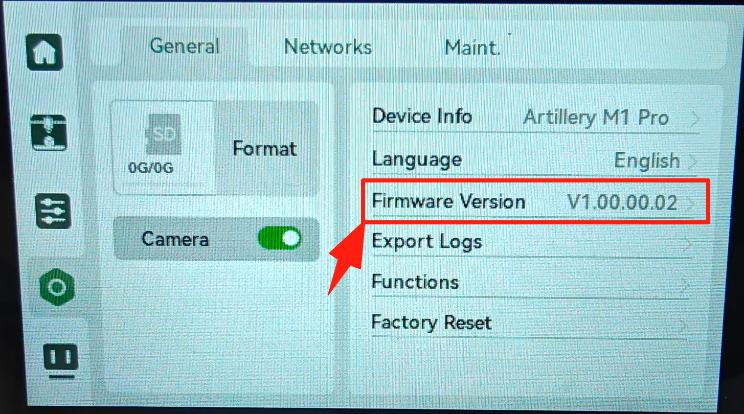 |
 |
¶ Computer WIFI remote connection printing operation
(Note: Slicing software updated to: ArtilleryStudioV1.0.5 Machine firmware updated to: V.1.0.01.00 Remote operation)
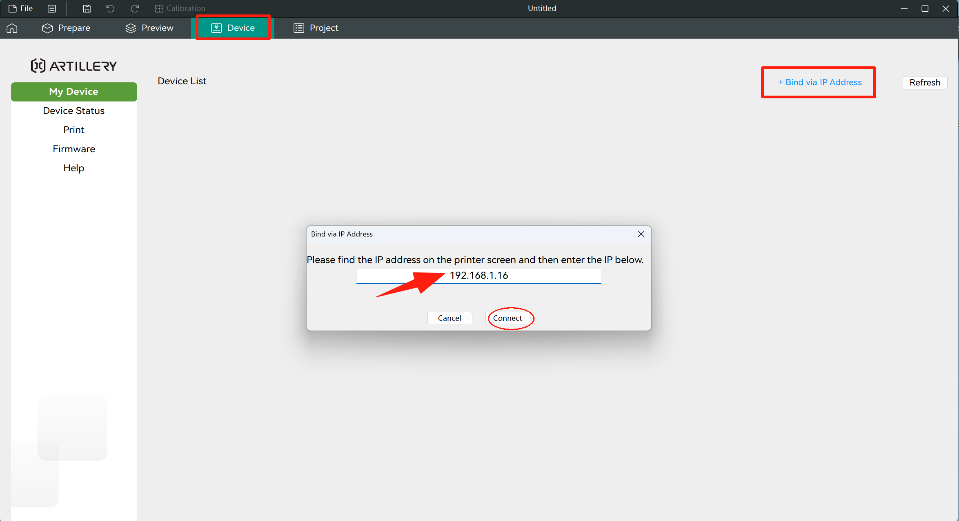
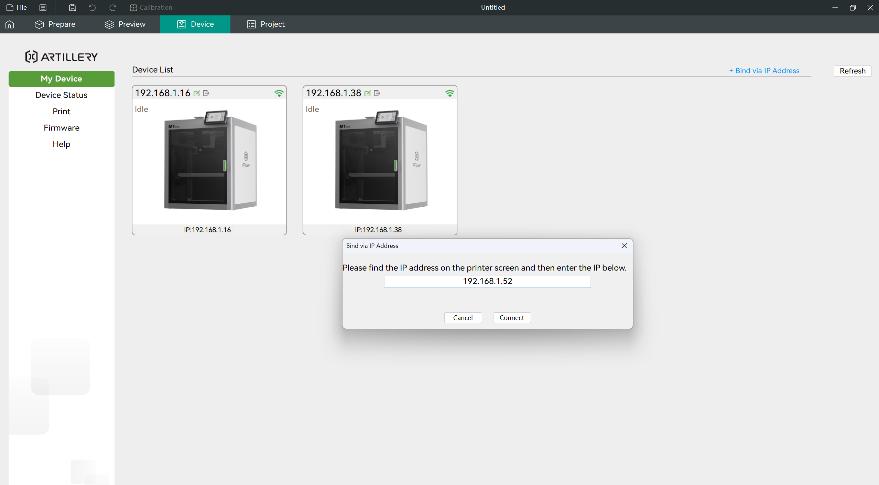
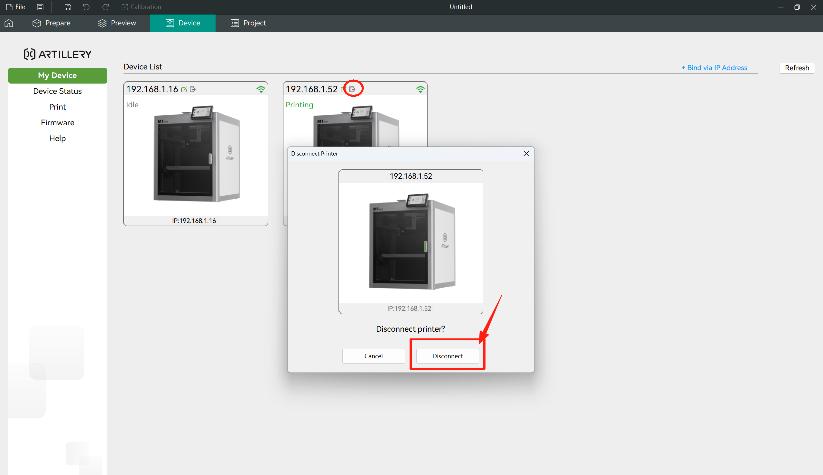
① . Open the installed ArtilleryStudio slicing software icon, go to Device Options - Add Binding via IP Address in the upper right corner, type in the product machine WIFI IP: address in the ArtilleryStudio slicing software checkbox correctly fill in the connection (the computer connects to the machine IP. Both must be on the same local area network to connect successfully, otherwise the connection will fail). If the connection is successful, the machine icon and IP address will be displayed in the equipment list. You can repeat the operation of adding multiple machines by IP address binding in the upper right corner. If you need to exit the connection, click the disconnect icon to the right of the machine IP in the device list to exit the connection.
As shown in the picture:
 |
 |
 |
 |
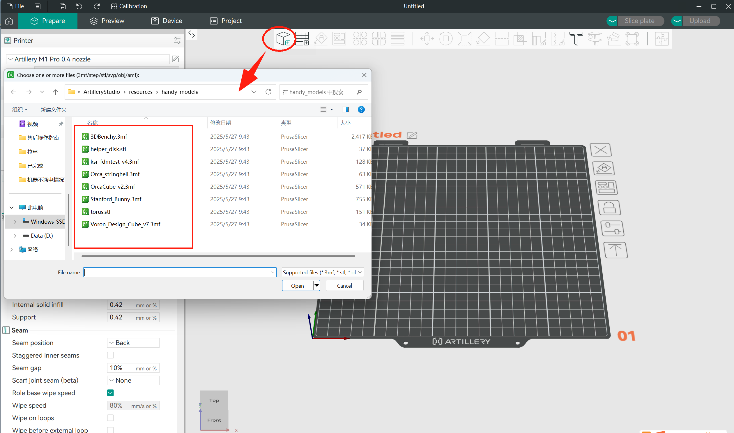
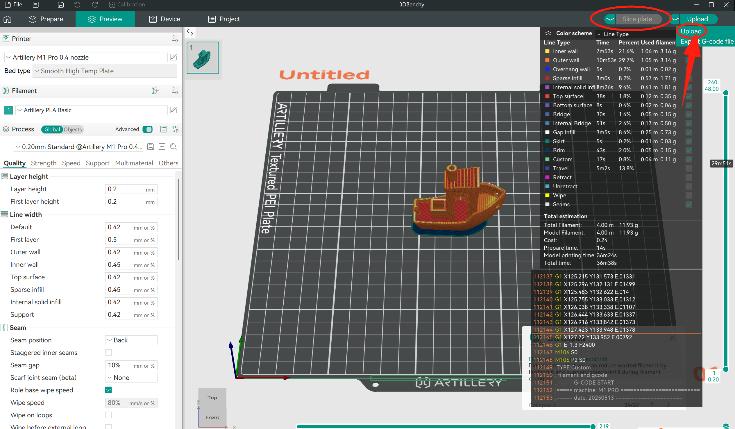
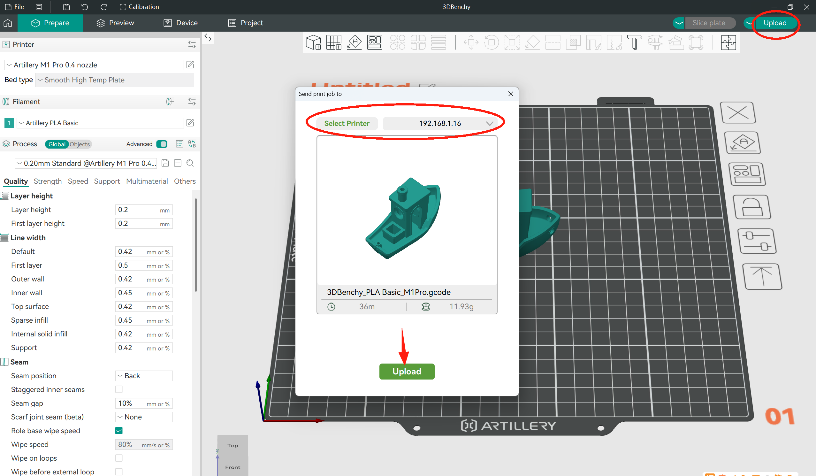
② . Import the model in ArtilleryStudio, select Print directly in the upper right corner after slicing and upload it to the corresponding machine's IP (e.g. IP: 192.168.**. **) to the corresponding machine IP (e.g. IP: 192.168.**.) SD card/in-machine storage for automatic printing.
As shown in the picture:
 |
 |
 |
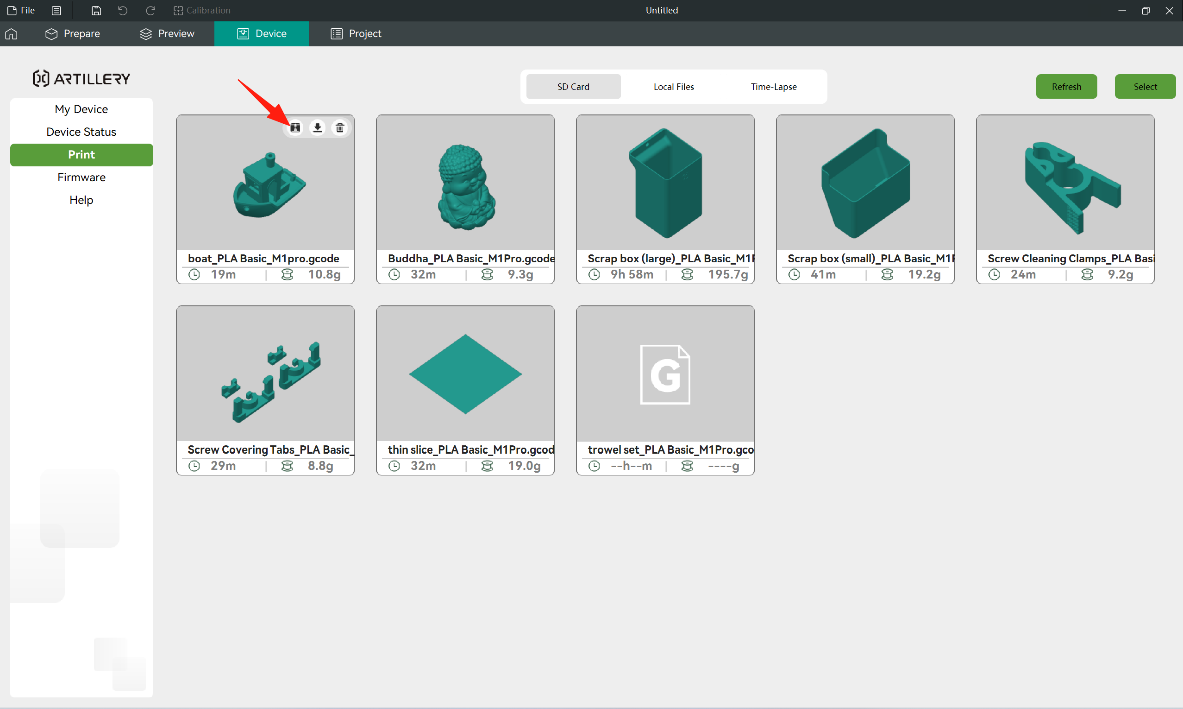
You can print the model file from the SD card by selecting it at the device, as shown by the small arrow button in the picture.
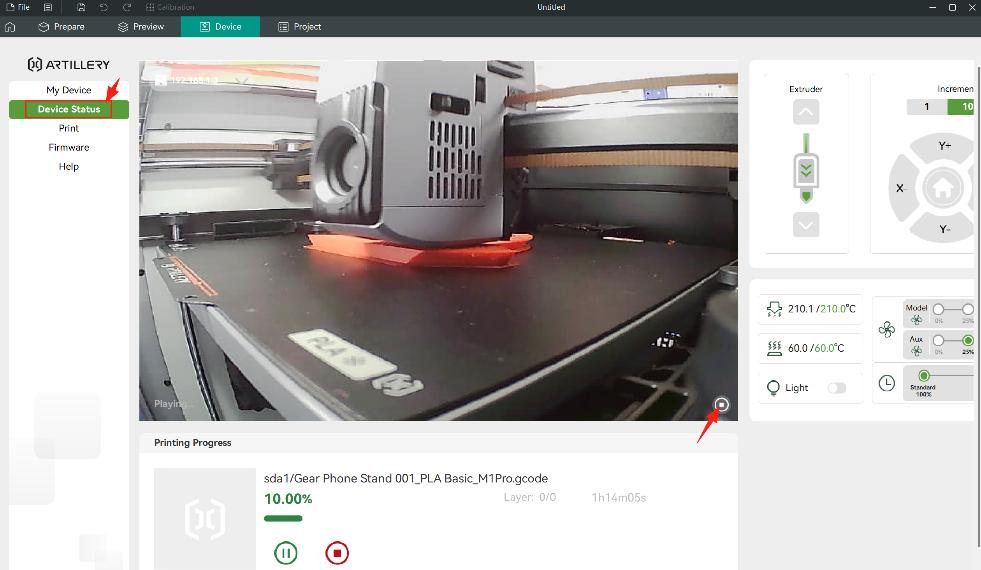
③ . Check the status of the device in ArtilleryStudio Remote Connected Devices: In the device status, the photographic frame in the upper left corner can be individually selected to consult the machine IP The lower right corner to stop or play the machine's operating status. The lower part can be operated to pause and stop the control state printing. The right side of the picture when the machine does not print, you can operate the axis movement and feed function keys.
As shown:
Operating in ArtilleryStudio Connected Devices: Firmware Updates, Help, Pending Optimisation Updates