¶ Removal and replacement of screw tools
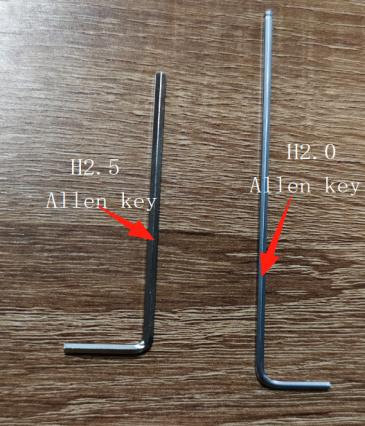
Hexagon socket wrench H2.0 H2.5
¶ Steps for removing the screw
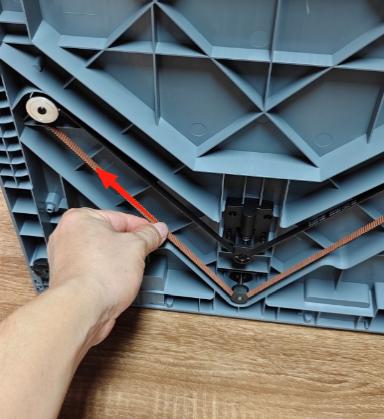
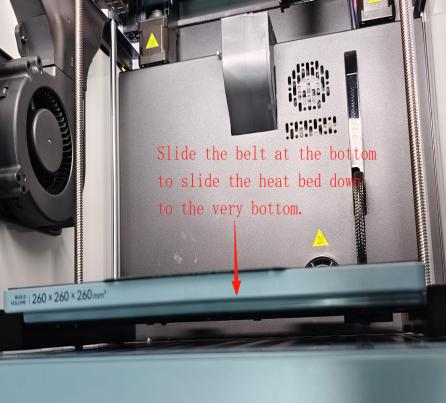
1.Tilt the machine back and pull on the belt and slide it along the arrow to make the heat bed slide down to the very bottom.
As shown:
 |
 |
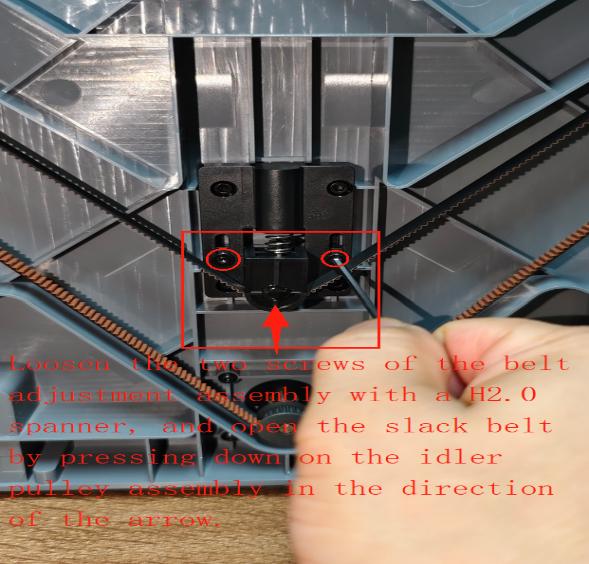
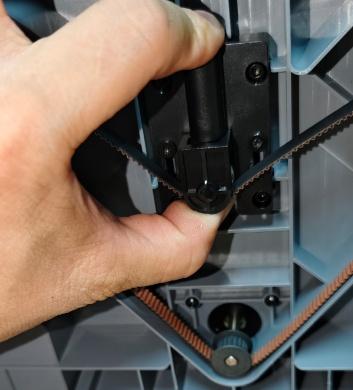
2. Loosen the adjusting belt idler pulley assembly (screw x 2) with an H2.0 hexagonal wrench, and press the idler pulley assembly by hand in the direction of the arrow to loosen the belt. Remove the Z-axis screw belt.
As shown in the figure:
 |
 |
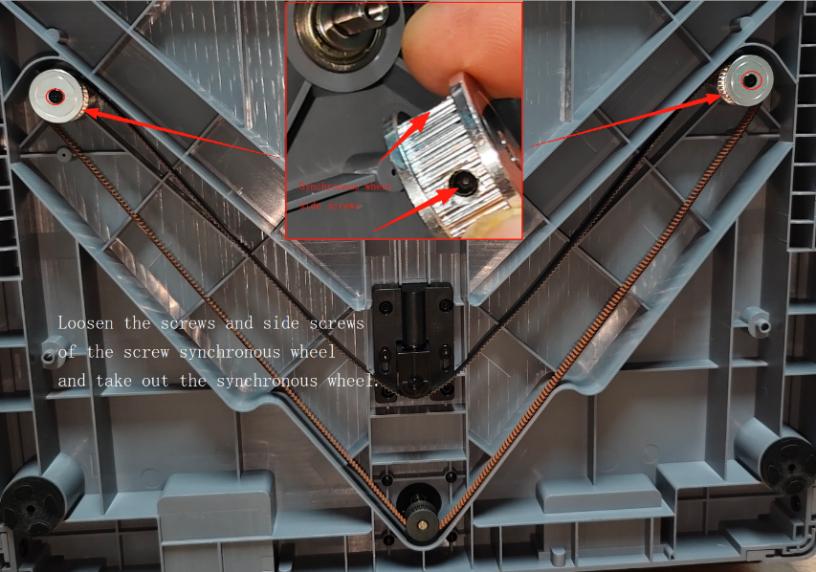
3. Take out the screws of the screw rod to fix the synchronous wheel and loosen the fixing screws on the side of the synchronous wheel to take out the synchronous wheel.
As shown in the picture:
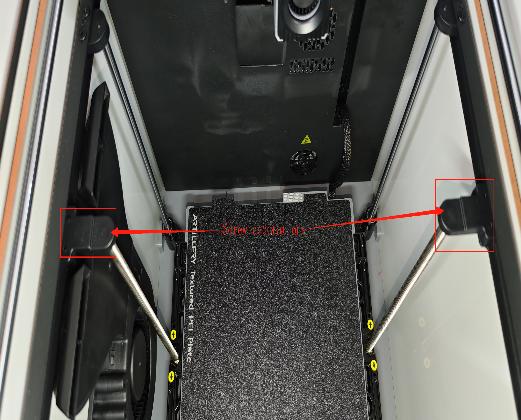
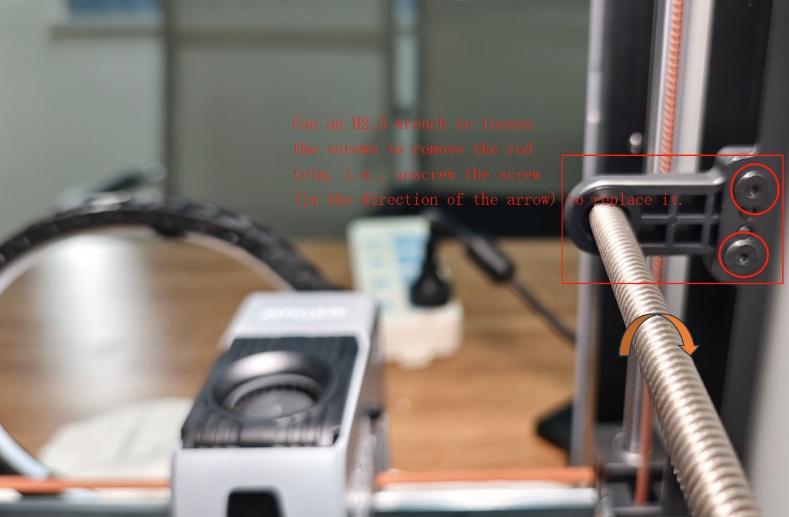
4. ①Use H2.5 spanner to remove the screws of the right side of the screw decoration, then you can unscrew the screw (arrow direction) and replace it.
As shown in the figure:
 |
 |
Left screw trim
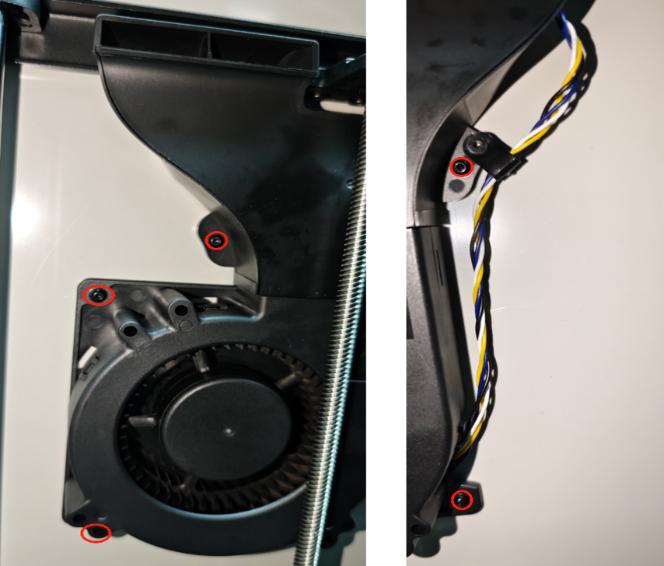
②Use H2.0 spanner to remove the left side of the blower fan (screw × 5) as shown in the figure: Repeat the steps in reference ① with H2.5 hexagonal wrench to remove the left side of the screw rod decorative parts screws, you can unscrew the screw rod (in the direction of the arrow) down to replace.
¶ Installation of replacement screws step by step
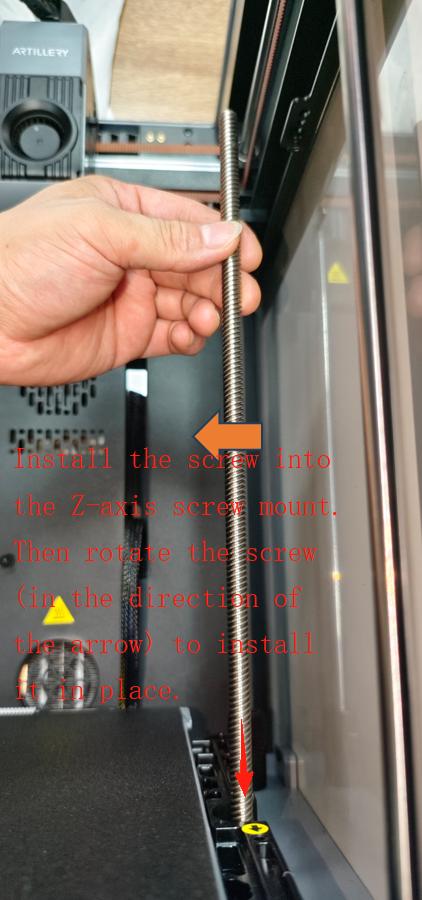
1. ①. Install the new screw into the Z-axis screw mount, and then proceed to rotate the screw (in the direction of the arrow) to install it in place. Before proceeding to install the silk rod trim, lock the trim (screws × 2) tightly.
As shown in the figure:
the right
 |
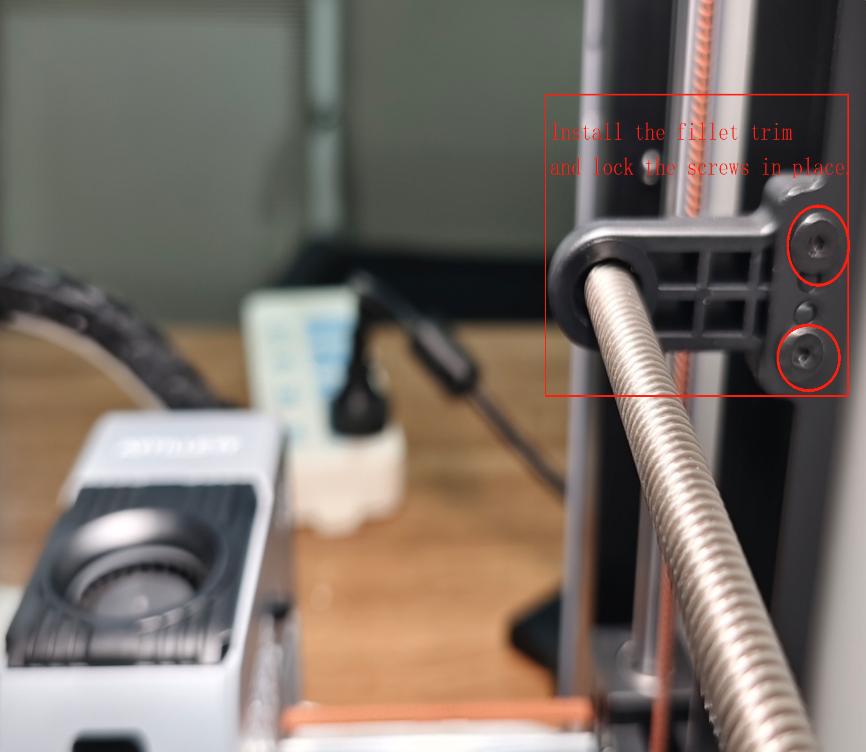 |
②. Install the new screw into the Z-axis screw mount, and then rotate the screw (in the direction of the arrow) to install it in place. Install the screw trim and tighten the trim screws with a H2.5 hexagonal spanner.
As pictured above:
Then proceed to the next step of installing the blower fan back into the left side closure plate and lock the left side blower fan (screws x 5) tight with an H2.0 wrench.
As pictured:

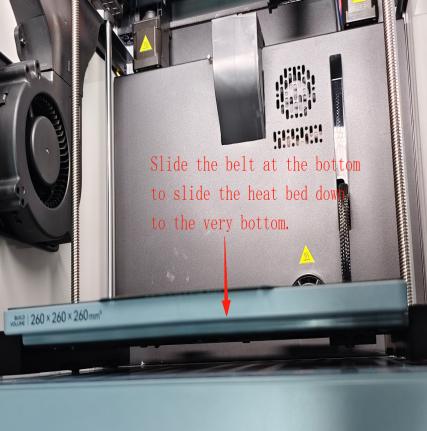
2. Tilt the machine back and slide the heat bed down to the very bottom.
As shown:
3. Manual - Hold the screw in place and proceed to the next step of installing the synchro wheel. Note: ①Isolation spacer must be installed before installing the synchronous wheel. ② One of the tightening nail screws of the synchronous wheel must be aligned with the notched position of the screw rod to install and lock the synchronous wheel screws and the screw rod to fix the synchronous wheel screws, and install the Z-axis belt.
As shown in the figure:
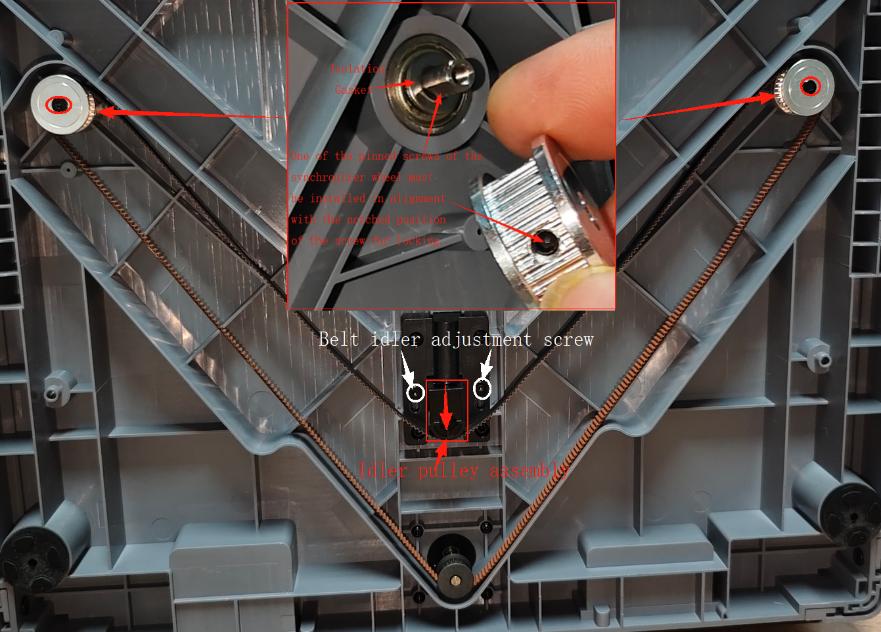
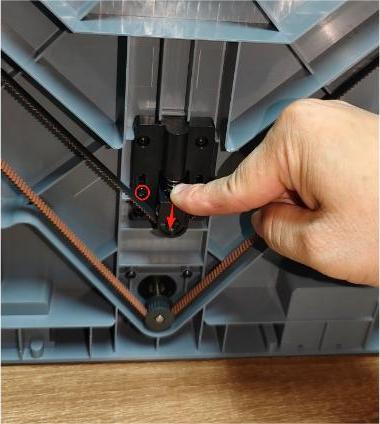
4.After installing the Z-axis belt, press down on the synchronous idler pulley to tighten the belt, and use the H2.0 hexagonal spanner to lock the adjustment (screw x 2).
As shown in the figure:
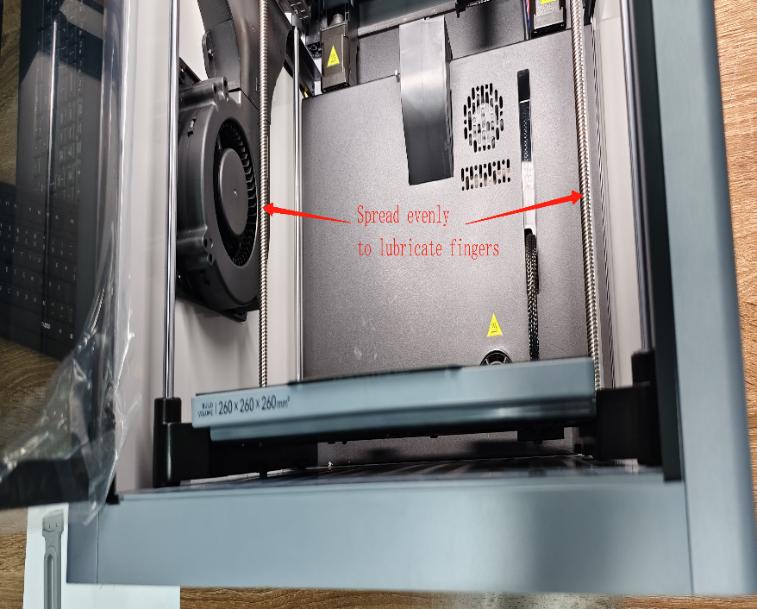
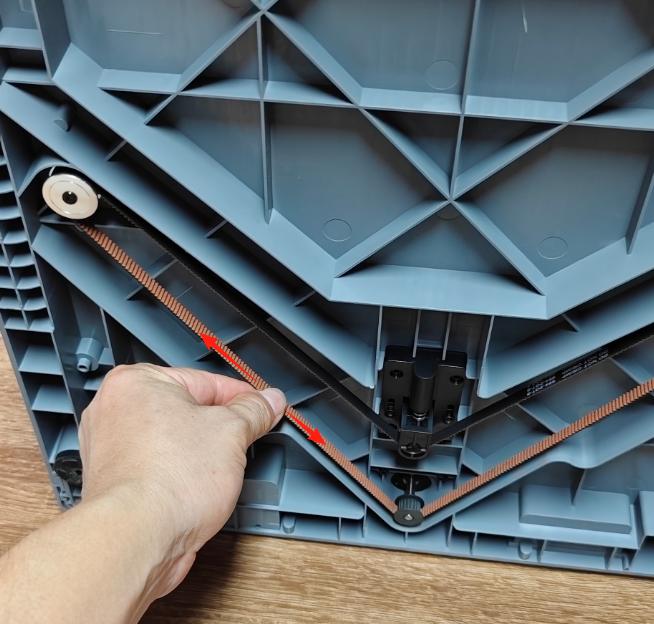
5. After completing the above steps, please apply a small amount of grease to the screw. And tilt the machine, slow back and forth to pull the belt so that the role of the screw smooth. As shown in the picture; installation and operation is complete, you can power on the machine to operate the print.
 |
 |